Printable DnD paper miniatures: a DM's guide
Paper minis aren't a budget compromise. A practical guide to printing, assembly, double-sided design, and when to use paper, plastic, or 3D printed.
There’s a snobbery around paper minis that doesn’t survive contact with actual play. The argument goes: paper minis are what you use when you can’t afford real ones. Real ones being plastic Wizkids or 3D-printed Hero Forge or hand-painted Reaper figures.
That’s wrong on the merits and wrong as a matter of practical DMing. Paper minis aren’t a fallback. For a lot of tables they’re the correct choice, and the DMs who’ve moved to them aren’t going back.
This is a practical guide to using printable paper minis well: how to choose them, how to print them, how to assemble them, and when paper is genuinely better than the alternatives.
Paper minis are not a compromise
Three real advantages over plastic.
Variety on demand. A plastic mini collection is bounded by what you’ve bought and what’s currently in stock. A paper mini library is bounded by what you can print. Need a goblin? Print a goblin. Need eight goblins? Print eight goblins. Need a goblin chief who’s slightly different from the regular goblins? Print one and label it. The flexibility is genuinely transformative for DMs who run varied encounters.
Replaceability. Players will lose minis. They’ll knock minis off the table. A dog will eat one. Plastic minis are gone forever. Paper minis you re-print in two minutes.
Storage. A box of 200 paper minis is the size of a paperback book. The same number of plastic minis is a piece of furniture.
The trade-off is presence. A painted plastic mini has more table presence than a folded paper one. That’s real. But for many encounters, especially encounters with multiple identical creatures, the table-presence advantage of plastic is moot. What matters is “which token represents the goblin who’s currently flanking the rogue?”, and a clearly-illustrated paper mini answers that as well as anything.
What makes a good paper miniature
Not all paper minis work equally well. The features to look for:
Strong silhouette at the base. When a player looks down at the table, they’re seeing the mini’s silhouette from a low angle. A mini whose distinguishing features are at the top (a tall hat, a raised weapon) reads better than one whose features are at the bottom. Most professional sets get this right.
Consistent scale. A goblin and a hill giant should be the right relative size. Sets that mix scales (because they were drawn by different artists or sourced from different packs) cause problems at the table when the giant ends up the same height as the orc.
A clear base. The base, the flat tab at the bottom that tucks into the stand, should be wide enough to be stable but not so wide it overflows the grid square. Standard medium creatures should have a base that fits comfortably in a 1-inch square.
Print-ready files. PDFs that are formatted for A4 or US Letter, with cut lines, fold lines, and a sensible number of minis per page. Bonus points if the artist has thought about ink usage and provided a “low-ink” variant.
How to print and assemble paper minis at home
The basic workflow:
- Print the PDF on standard printer paper or, better, on cardstock (160 to 200gsm). Cardstock is more durable and stands up straighter.
- If using regular paper, glue it to a sheet of card before cutting.
- Cut around each miniature, leaving the bottom tab attached.
- Fold along the centre line so the mini is double-sided (front and back facing the same way).
- Tuck the bottom tab into a base. Bases can be acrylic stands ($7 for 50 on most hobby sites), foam squares, or the integrated paper bases included in most well-designed sets.
Total time per mini: about 90 seconds once you’ve got the rhythm down. A batch of 20 minis takes maybe 30 minutes from print to ready.
Lamination: worth it?
If you’ll re-use the same minis across many sessions, lamination doubles or triples their lifespan. A cheap home laminator pays for itself after about 100 minis. If you’re printing fresh minis for each session, skip it.
Double-sided vs. single-sided: does it matter?
Yes. A single-sided mini looks fine from the front and shows a blank back to the players sitting on the opposite side of the table. A double-sided mini shows the same illustration to everyone.
This matters more than it sounds. Players sitting on the “wrong” side of the table effectively can’t see what the mini represents in single-sided sets. They’re staring at a blank rectangle. Double-sided minis fix this. Most professionally-designed paper mini sets are double-sided as standard. Avoid single-sided sets unless they’re specifically priced for that limitation.
Paper minis vs. 3D printed vs. plastic: when to use each
Three different tools, three different jobs.
Paper minis are for variety, mooks, named NPCs you didn’t plan in advance, and encounters with lots of identical creatures. Cheap, fast, replaceable.
3D printed minis are for set-piece moments. The dragon at the end of the campaign. The lich the party finally confronts. The signature monsters whose physical presence on the table is part of the experience. The slow print time and per-print cost mean you’re not printing a mob of orcs. You’re printing the orc warlord.
Plastic painted minis are for player characters. The character a player will use across a multi-year campaign genuinely benefits from the time investment of painting. The signature look becomes part of the character’s identity at the table.
Most experienced DMs end up using all three. Paper for the bulk of NPCs and monsters, 3D printed for boss fights and important monsters, plastic for player characters.
Building a print-on-demand mini library
The “build a library” approach to paper minis is the one that pays off. Instead of printing minis for the encounter you’re running tonight, print a library of common creatures (goblins, kobolds, bandits, cultists, guards, wolves, etc.) and keep them in a binder or storage box. Then when you need them, which you will, they’re already done.
A mid-sized library of 100 to 200 paper minis covers maybe 80% of the encounters you’ll run in a typical campaign. The remaining 20%, the specific named NPCs, unusual creatures, and the boss you’ve designed yourself, you print fresh for the session.
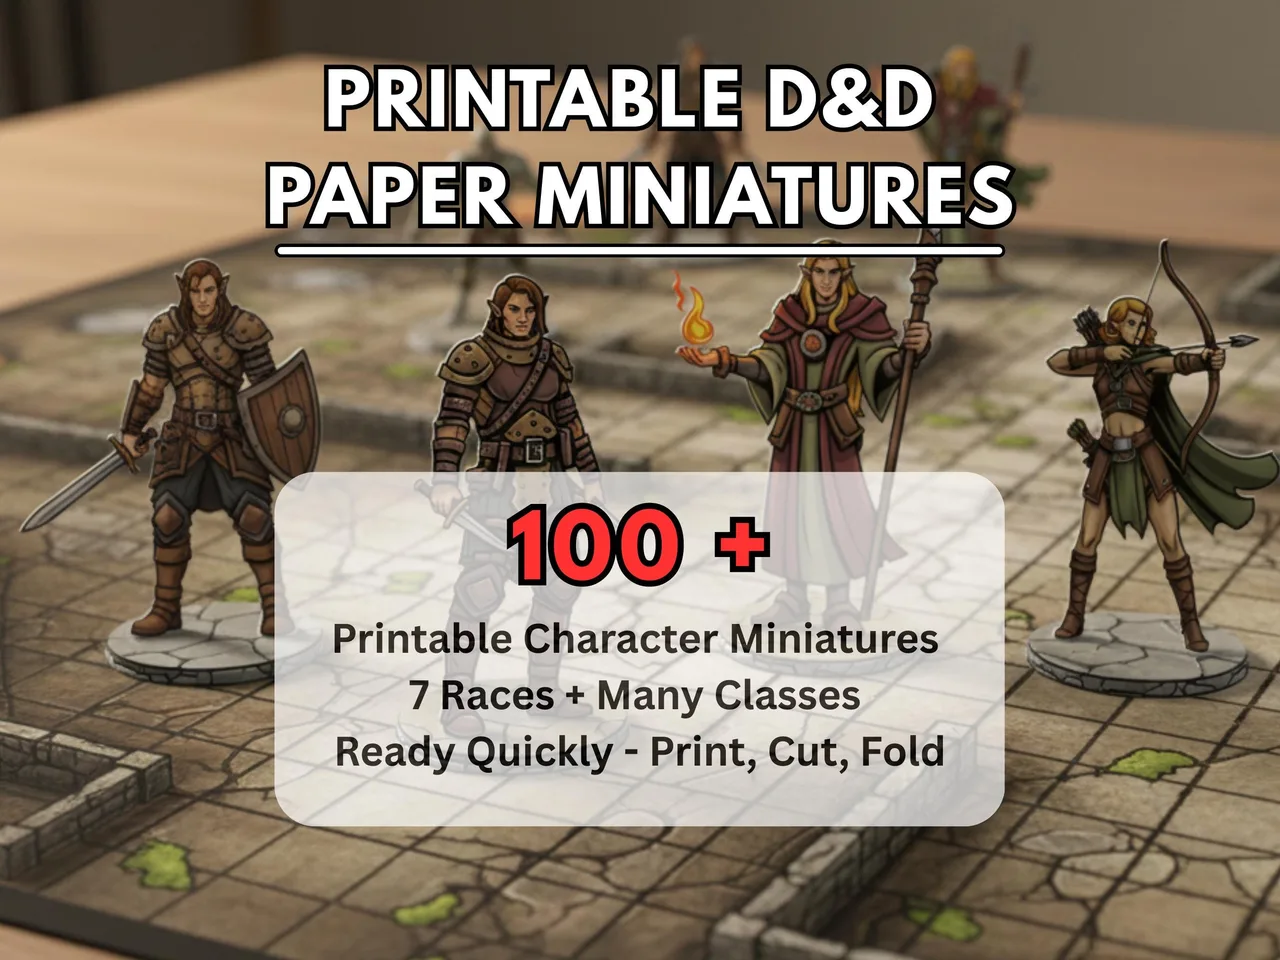
The RPG Miniatures Paper Minis Bundle Pack ($17 $4.25) is the practical starting point. It’s structured as a library, not a one-off: humanoid enemies, beasts, monsters, undead, NPCs, all in a consistent illustration style with proper double-sided design. At $17 for a complete library that covers the bulk of standard 5e encounters, the cost-per-mini works out to a few pence. Print the whole bundle on cardstock over a weekend and you have a library that lasts years.
When you’re ready to print in 3D
Paper minis don’t replace 3D printing. They complement it. Once you’ve got your paper library handling the day-to-day, the next upgrade is selective 3D printing for set pieces.
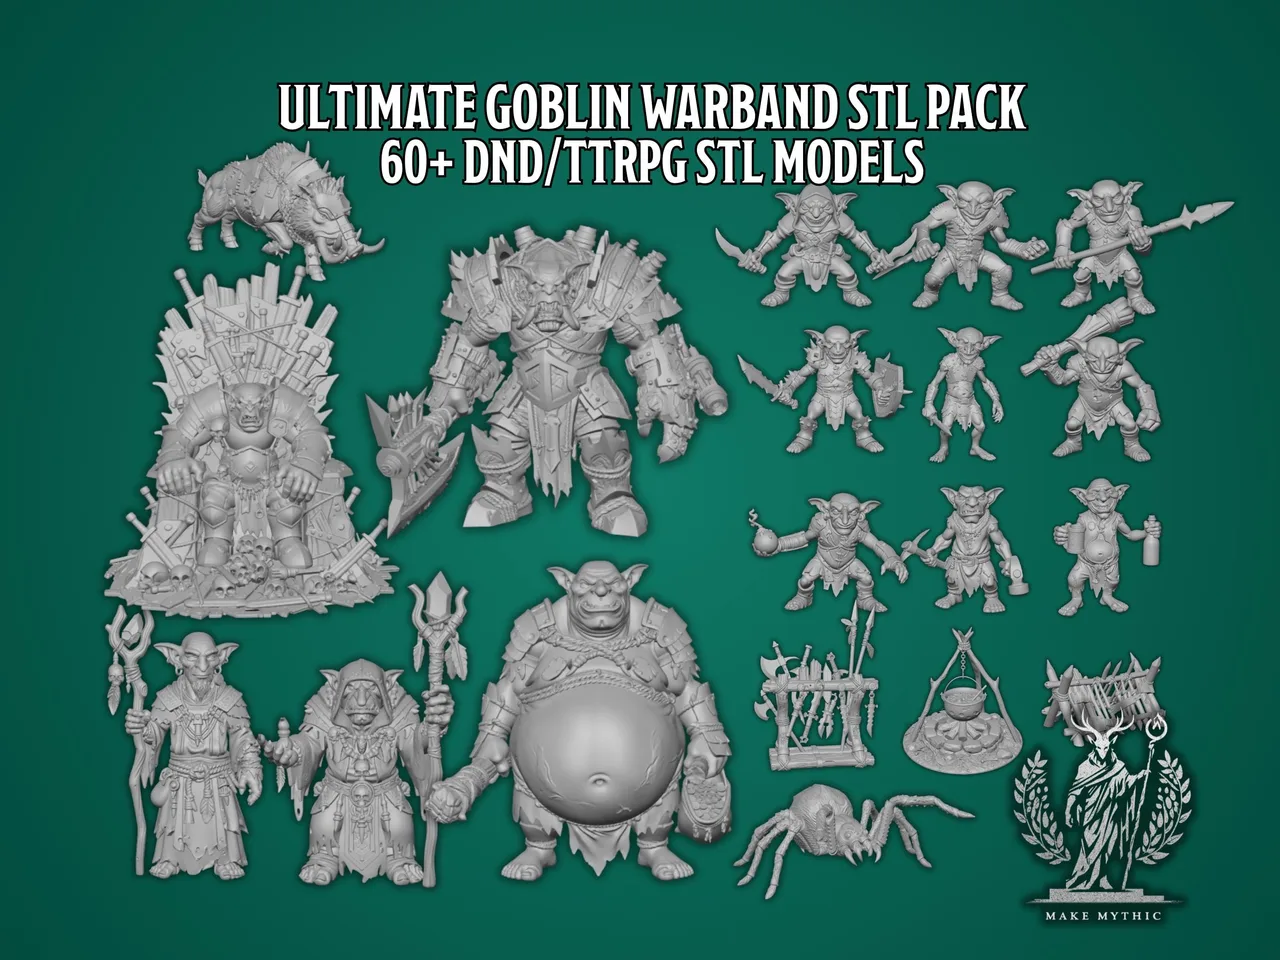
The RPG Goblin STL Pack ($31 $7.75) is a starter set for DMs who own (or have access to) a resin or filament printer. Goblins are a useful test case: small, cheap to print in volume, and one of the creatures you’ll genuinely use a lot. A pack of varied goblin sculpts gives a goblin warband real visual presence on the table without committing to a full 3D-printing workflow for every monster.
The honest version: most DMs don’t need 3D printed minis to run good games. Paper covers it. But if you have a printer or want to experiment with one, having a library of STLs in your back pocket means you’ve always got the option.
Frequently asked questions
- What paper should I use to print DnD miniatures?
- 160 to 200gsm cardstock gives the best durability and keeps minis standing straight. Standard printer paper works but benefits from being glued to card before cutting. Lamination doubles lifespan if you plan to reuse the same minis across many sessions.
- Are double-sided paper minis better than single-sided?
- Yes. Single-sided minis show a blank back to players on the opposite side of the table. Double-sided minis display the illustration from every seat. Most professionally-designed paper mini sets are double-sided as standard.
- How long does it take to assemble paper miniatures?
- About 90 seconds per mini once you have the rhythm. A batch of 20 takes roughly 30 minutes from printing to table-ready. The workflow is: print, cut, fold along the centre line, and tuck the base tab into an acrylic stand.
- When should I use paper minis instead of 3D printed or plastic?
- Paper for mooks and variety, such as goblins, bandits, cultists, and wolves. 3D printed for boss fights and set-piece moments where physical presence on the table matters. Plastic for player characters used across a multi-year campaign.
- Where can I buy printable DnD paper miniatures?
- MakeMythic on Etsy sells a paper minis bundle covering humanoids, beasts, monsters, undead, and NPCs in a consistent double-sided style. Available as an instant-download PDF for printing at home or at a print shop.
Keep reading
From the shop
Battlemaps, spell cards, and magic item cards, ready to print.
Browse MakeMythic on Etsy →